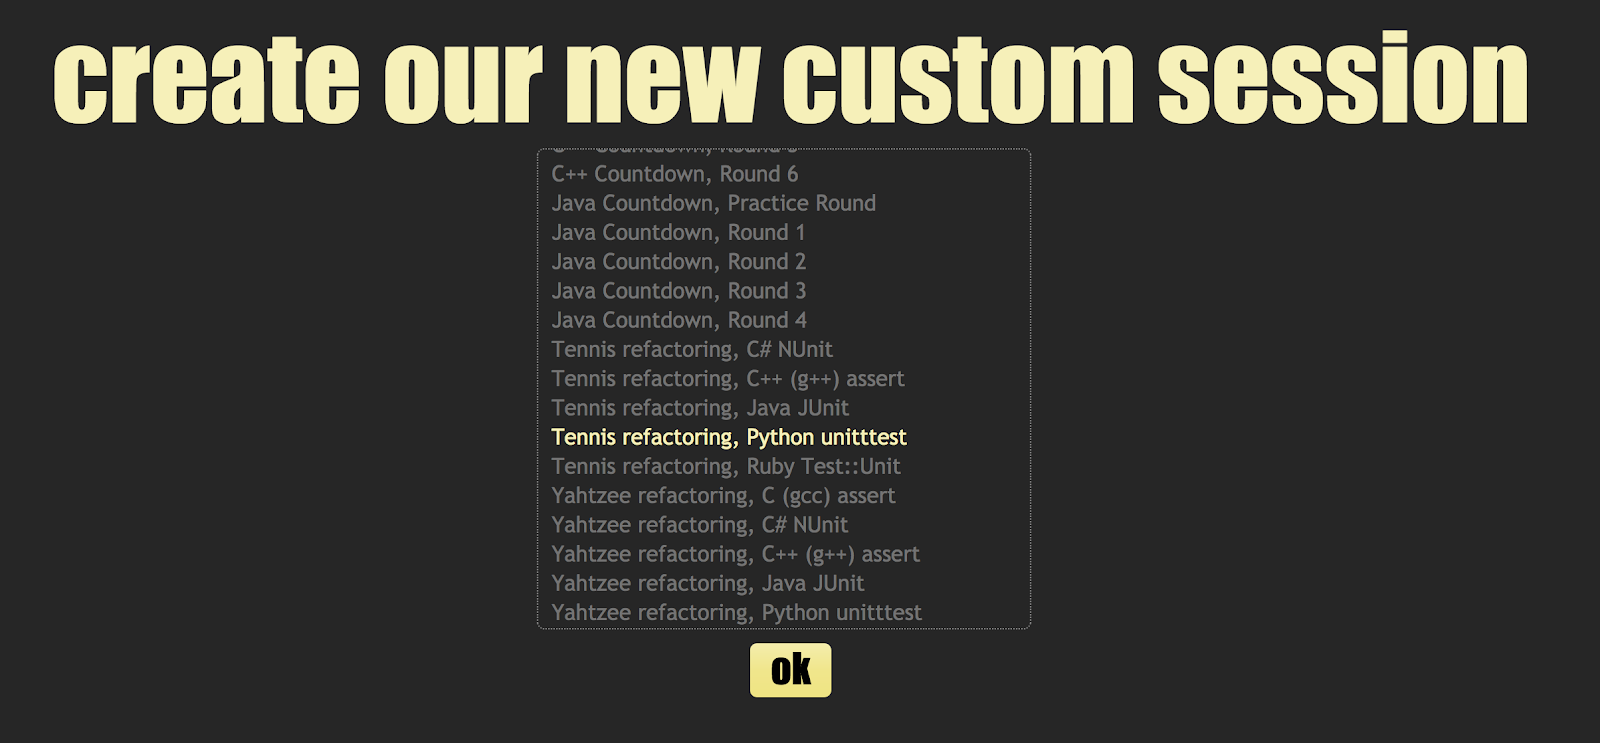
cyber-dojo web server default  start-points

This page holds the choices where you select both your language+testFramework (eg Java,Cucumber) and your exercise (eg Print Diamond).


This page holds the customized choices (eg Tennis refactoring, Python unittest).


The language+testFramework list is served (by default) from a start-point image called languages.
The exercises list is served (by default) from a start-point image called exercises.
The custom list is served (by default) from a start-point image called custom.

A start-point image is created from a list of git-repo URLs, using the main cyber-dojo script, as follows:
$ cyber-dojo start-point create NAME --languages <URL>...

The three default start-point images were created using the main cyber-dojo script, as follows:
$ LSP=https://raw.githubusercontent.com/cyber-dojo/languages-start-points $ cyber-dojo start-point create languages \ --languages $(curl ${LSP}/master/start-points/common) $ cyber-dojo start-point create exercises \ --exercises https://github.com/cyber-dojo/exercises-start-points $ cyber-dojo start-point create custom \ --custom https://github.com/cyber-dojo/custom-start-points

Note the curl simply expands to a list of git-repo URLs, one for each of the most common language+testFrameworks. Each git-repo URL must contain a manifest.json file.

To use a different default start-point simply bring down the server, delete the one you wish to replace, create a new one with that default name, and bring the server back up. For example, to create a new languages start-point specifying just the Ruby test-frameworks:
$ cyber-dojo down $ cyber-dojo start-point rm languages $ cyber-dojo start-point create languages \ --languages \ https://github.com/cyber-dojo-languages/ruby-approval \ https://github.com/cyber-dojo-languages/ruby-cucumber \ https://github.com/cyber-dojo-languages/ruby-minitest \ https://github.com/cyber-dojo-languages/ruby-rspec \ https://github.com/cyber-dojo-languages/ruby-testunit $ cyber-dojo up


cyber-dojo new release

The new release of cyber-dojo just went live :-)


creating your own server start-points

cyber-dojo's architecture has customisable start-points.

preparing your start-point

  • Simply create a manifest.json file for each individual start-point.
    eg
    $ mkdir -p douglas/one douglas/two $ touch douglas/one/manifest.json douglas/two/manifest.json
  • Edit each manifest.json files
    Here's an explanation of the manifest.json format.
    Here's an example.
  • Create a git repository in the top level directory.
    eg
    $ cd douglas $ git init $ git add . $ git commit -m "first commit"


creating your start-point

Use the cyber-dojo script to create a new start-point naming the URL of the git repo (in this case ${PWD}). For example
$ cd douglas $ cyber-dojo start-point create adams/my_custom --custom ${PWD}
which attempts to create a custom start-point image called adams/my_custom from all the files in the douglas directory. If the creation fails the cyber-dojo script will print diagnostics.


starting your server with your start-point

eg with a custom start-point called adams/my_custom
$ cyber-dojo up --custom=adams/my_custom

eg with a languages start-point named adams/my_languages
$ cyber-dojo up --languages=adams/my_languages

eg with an exercises start-point named adams/my_exercises
$ cyber-dojo up --exercises=adams/my_languages

eg with a combination
$ cyber-dojo up --languages=adams/my_languages --exercises=adams/my_exercises


adding a new language + test-framework to cyber-dojo

THE INFORMATION BELOW IS OUT OF DATE.
It will be updated properly soon.
Meanwhile, follow step 0 below, and then look at these examples from the cyber-dojo-languages github organization: Note how each repo's .travis.yml file simply runs the run_build_image.sh script which builds and tests the docker image and any associated start-point code. In particular the script augments the Dockerfile commands in various ways (eg adding users for the 64 avatars). Alternatively, if you are building your docker-image using a raw [docker build] command you must base your docker-image FROM a cyber-dojo-languages dockerhub image.


0. Install docker


1. Create a docker-image for just the language

Make this docker-image unit-test-framework agnostic.
If you are adding a new unit-test-framework to an existing language skip this step.
For example, suppose you were building Lisp
  • Create a new folder for your language
    eg.
    $ md lisp
  • In your language's folder, create a file called Dockerfile
    $ cd Lisp $ touch Dockerfile
    If you can, base your new image on Alpine-linux as this will help keep images small. To do this make the first line of Dockerfile as follows
    FROM cyberdojofoundation/language-base
    Here's one based on Alpine-linux (217 MB: C#) Dockerfile
    Here's one not based on Alpine (Ubuntu 1.26 GB: Python) Dockerfile
  • Use the Dockerfile to build a docker-image for your language.
    For example
    $ docker build -t cyberdojofoundation/lisp .
    which, if it completes, creates a new docker-image called cyberdojofoundation/lisp using the Dockerfile (and build context) in . (the current folder).


2. Create a docker-image for the language and test-framework

Repeat the same process, building FROM the docker-image you created in the previous step.
For example, suppose your Lisp unit-test framework is called lunit
  • Create a new folder underneath your language folder
    $ cd lisp $ md lunit
  • In your new test folder, create a file called Dockerfile
    $ cd lunit $ touch Dockerfile
    The first line of this file must name the language docker-image you built in the previous step.
    Add lines for all the commands needed to install your unit-test framework...
    FROM cyberdojofoundation/lisp RUN apt-get install -y lispy-lunit RUN apt-get install -y ...
  • Create a file called red_amber_green.rb
    $ touch red_amber_green.rb
  • In red_amber_green.rb write a Ruby lambda accepting three arguments. For example, here is the C#-NUnit red_amber_green.rb:
    lambda { |stdout,stderr,status| output = stdout + stderr return :red if /^Errors and Failures:/.match(output) return :green if /^Tests run: (\d+), Errors: 0, Failures: 0/.match(output) return :amber }
    cyber-dojo uses this to determine the test's traffic-light colour by passing it the stdout, stderr, and status outcomes of the test run.
  • The Dockerfile for your language+testFramework must COPY red_amber_green.rb into the /usr/local/bin folder of your image. For example:
    FROM cyberdojofoundation/lisp RUN apt-get install -y lispy-lunit RUN apt-get install -y ... COPY red_amber_green.rb /usr/local/bin
    I usually start with a red_amber_green.rb that simply returns :red. Then, once I have a start-point using the language+testFramework docker-image, I use cyber-dojo to gather outputs which I use to build up a working red_amber_green.rb
  • Use the Dockerfile to try and build your language+testFramework docker-image.
    The name of an image takes the form hub-name/image-name. Do not include a version number in the image-name. For example
    $ docker build -t cyberdojofoundation/lisp_lunit .
    which, if it completes, creates a new docker image called cyberdojofoundation/lisp_lunit using the Dockerfile in . (the current folder).


3. Use the language+testFramework docker-image in a new start-point

Use the new image name (eg cyberdojofoundation/lisp_lunit) in a new manifest.json file in a new start-point.


cyber-dojo start-points manifest.json entries explained

Example: the manifest.json file for Java/JUnit looks like this:

{ "image_name": "ghcr.io/cyber-dojo-languages/java_junit:7aa5992", "display_name": "Java 25.0.2, JUnit 6.0.3", "visible_filenames": [ "Hiker.java", "HikerTest.java", "cyber-dojo.sh" ], "rag_lambda": "red_amber_green.rb", "filename_extension": [ ".java" ], "max_seconds": 10, "tab_size": 4, "progress_regexs" : [ "Tests run\\: (\\d)+,(\\s)+Failures\\: (\\d)+", "OK \\((\\d)+ test(s)?\\)" ] }


Required entries


"image_name": string

The name of the docker image used to run a container in which cyber-dojo.sh is executed. Do not include any version numbers (eg of the compiler or test-framework). All packages/tools/libraries/files/etc used in cyber-dojo.sh (for example the java compiler) must be installed in this image. When cyber-dojo.sh runs inside this image it has no access to the internet.


"display_name": string

The name as it appears in the start-point setup pages. For example, "Java 25.0.2, JUnit 6.0.3" means that "Java 25.0.2, JUnit 6.0.3" will appear as a selectable entry when choosing your language + test-framework when setting up your practice session. A single string typically with the language name first, then a comma, then the test-framework name.


"visible_filenames": [ string, string, ... ]

Filenames that will be visible in the browser's editor when an animal initially enter's a cyber-dojo. Each of these files must be a plain text file and exist in the manifest.json's directory. Filenames can be in nested sub-directories, eg "tests/HikerTest.java". Must include "cyber-dojo.sh". This is because cyber-dojo.sh is the name of the shell file assumed by the runner to be the start point for running the tests. You can write any actions inside cyber-dojo.sh but clearly any programs it tries to run must be installed in the docker image_name. For example, if cyber-dojo.sh runs gcc to compile C files then gcc has to be installed. If cyber-dojo.sh runs javac to compile java files then javac has to be installed.


"rag_lambda": string

The filename containing a Ruby lambda returning a test's traffic-light colour (red, amber, or green) from the stdout, stderr, status of cyber-dojo.sh. For example, here's the one for Java-JUnit.

lambda { |stdout,stderr,status| output = stdout + stderr containers_pattern = Regexp.new('^\[\s+(\d+) containers failed\s+\]') if match = containers_pattern.match(output) if match[1] != '0' return :amber end end tests_pattern = Regexp.new('^\[\s+(\d+) tests failed\s+\]') if match = tests_pattern.match(output) if match[1] == '0' return :green else return :red end else return :amber end }


The lambda can return red, amber, or green as a :symbol or a string. It should return:
  • green if the tests all passed
  • red if a test assertion fails
  • amber if there is a "non-assertion" error, eg a syntax error. This is usually straightforward for statically typed languages such as C. For dynamically typed languages such as Python it can be less straightforward - do what seems sensible.


"filename_extension": [ string, string, ... ]

The extensions of source files. The first entry is also used when creating a new filename. Must be non-empty.


"tab_size": int

The number of spaces a tab character expands to in the editor. Must be an integer between 1 and 12.


Optional entries


"progress_regexs": [ string, string ]

Used on the dashboard to show the test output line (which often contains the number of passing and failing tests) of each animal's most recent red/green traffic light. Useful when your practice session starts from a large number of pre-written tests and you wish to monitor the progress of each animal.
An array of two strings used to create Ruby regexs. The first one to match a red traffic light's test output, and the second one to match a green traffic light's test output.
An example for Python, unittest.
Defaults to [ ].


"highlight_filenames": [ string, string, ... ]

Filenames whose appearance is highlighted in the browser. This can be useful if you have many "visible_filenames" and want to mark which files form the focus of the practice.
An array of strings. A strict subset of "visible_filenames".
Defaults to [ ].


"hidden_filenames": [ string, string, ... ]

cyber-dojo.sh may create extra files (eg profiling stats). All text-files created under /sandbox are returned to the browser unless their name matches any of these string regexs.
An array of strings used to create Ruby regexs, used by cyber-dojo, like this Regexp.new(string). For example, to hide files ending in .d you can use the following string ".*\\.d"
Defaults to [ ].
DEPRECATED. Instead, inside cyber-dojo.sh, use a trap handler to delete unwanted files. For example here's a trap handler for Ruby, Approval.


"max_seconds": int

The maximum number of seconds cyber-dojo.sh has to complete.
An integer between 1 and 20.
Defaults to 10.
DEPRECATED.

running your own cyber-dojo web server

cyber-dojo traffic-lights!

My friend Byran who works at the awesome Bluefruit Software in Redruth has hooked up his cyber-dojo web server to an actual traffic-light! Fantastic. Check out the video below :-)


Byran writes
It started out as a joke between myself and Josh (one of the testers at Bluefruit). I had the traffic lights in my office as I was preparing a stand to promote the outreach events (Summer Huddle, Mission to Mars, etc...) Software Cornwall runs. The conversation went on to alternative uses for the traffic lights, I was planning to see if people would pay attention to the traffic lights if I put them in a corridor at the event; we then came up with the idea that we could use them to indicate TDD test status.
Although it started out as a joke I am going to use it at the Summer Huddle, the lights change every time anyone runs a test so it should give an idea of how the entire group are doing without highlighting an individual pair.
The software setup is very simple, there is a Python web server (using the Flask library) running on a Raspberry Pi that controls the traffic lights using GPIO Zero. When the appendTestTrafficLight() function (in run_tests.js.erb) appends the traffic light image to the webpage I made it send an http 'get' request to the Raspberry Pi web server to set the physical traffic lights at the same time. At the moment the IP address of the Raspberry Pi is hard coded in the 'run_tests.js.erb' file so I have to rebuild the web image if anything changes but it was only meant to be a joke/proof of concept. The code is on a branch called traffic_lights on my fork of the cyber-dojo web repository.
The hardware is also relatively simple, there is a converter board on the Pi; this only converts the IO pin output connector of the Raspberry Pi to the cable that attaches to the traffic lights.
The other end of the cable from the converter board attaches to the board in the top left of the inside the traffic lights; this has some optoisolators that drive the relays in the top right which in turn switch on and off the transformers (the red thing in the bottom left) that drive the lights.
I have to give credit to Steve Amor for building the hardware for the traffic lights. They are usually used during events we run to teach coding to children (and sometimes adults). The converter board has LEDs, switches and buzzers on it to show that there isn't a difference between writing software to toggle LEDs vs driving actual real world systems, it's just what's attached to the pin. Having something where they can run the same code to drive LEDs and drive real traffic lights helps to emphasise this point.